19. Cài đặt fail2ban
Mặc dù đây là tùy chọn không bắt buộc, nhưng chúng tôi khuyến cáo bạn cài đặt bởi màn hình ISPConfig sẽ hiển thị đăng nhập fail2ban:
apt-get install fail2ban
Để làm cho fail2ban theo dõi PureFTPd, SASL, và Courier, tạo file /etc/fail2ban/jail.local:
vi /etc/fail2ban/jail.local
[pureftpd]
enabled = true
port = ftp
filter = pureftpd
logpath = /var/log/syslog
maxretry = 3
[sasl]
enabled = true
port = smtp
filter = sasl
logpath = /var/log/mail.log
maxretry = 5
[courierpop3]
enabled = true
port = pop3
filter = courierpop3
logpath = /var/log/mail.log
maxretry = 5
[courierpop3s]
enabled = true
port = pop3s
filter = courierpop3s
logpath = /var/log/mail.log
maxretry = 5
[courierimap]
enabled = true
port = imap2
filter = courierimap
logpath = /var/log/mail.log
maxretry = 5
[courierimaps]
enabled = true
port = imaps
filter = courierimaps
logpath = /var/log/mail.log
maxretry = 5
Sau đó tạo 5 file bộ lọc sau:
vi /etc/fail2ban/filter.d/pureftpd.conf
[Definition]
failregex = .*pure-ftpd: \(.*@<HOST>\) \[WARNING\] Authentication failed for user.*
ignoreregex =
vi /etc/fail2ban/filter.d/courierpop3.conf
# Fail2Ban configuration file
#
# $Revision: 100 $
#
[Definition]
# Option: failregex
# Notes.: regex to match the password failures messages in the logfile. The
# host must be matched by a group named “host”. The tag “<HOST>” can
# be used for standard IP/hostname matching and is only an alias for
# (?:::f{4,6}:)?(?P<host>\S+)
# Values: TEXT
#
failregex = pop3d: LOGIN FAILED.*ip=\[.*:<HOST>\]
# Option: ignoreregex
# Notes.: regex to ignore. If this regex matches, the line is ignored.
# Values: TEXT
#
ignoreregex =
vi /etc/fail2ban/filter.d/courierpop3s.conf
# Option: failregex
# Notes.: regex to match the password failures messages in the logfile. The
# host must be matched by a group named “host”. The tag “<HOST>” can
# be used for standard IP/hostname matching and is only an alias for
# (?:::f{4,6}:)?(?P<host>\S+)
# Values: TEXT
#
failregex = pop3d-ssl: LOGIN FAILED.*ip=\[.*:<HOST>\]
# Option: ignoreregex
# Notes.: regex to ignore. If this regex matches, the line is ignored.
# Values: TEXT
#
ignoreregex =
vi /etc/fail2ban/filter.d/courierimap.conf
# Fail2Ban configuration file
#
# $Revision: 100 $
#
[Definition]
# Option: failregex
# Notes.: regex to match the password failures messages in the logfile. The
# host must be matched by a group named “host”. The tag “<HOST>” can
# be used for standard IP/hostname matching and is only an alias for
# (?:::f{4,6}:)?(?P<host>\S+)
# Values: TEXT
#
failregex = imapd: LOGIN FAILED.*ip=\[.*:<HOST>\]
# Option: ignoreregex
# Notes.: regex to ignore. If this regex matches, the line is ignored.
# Values: TEXT
#
ignoreregex =
vi /etc/fail2ban/filter.d/courierimaps.conf
# Option: failregex
# Notes.: regex to match the password failures messages in the logfile. The
# host must be matched by a group named “host”. The tag “<HOST>” can
# be used for standard IP/hostname matching and is only an alias for
# (?:::f{4,6}:)?(?P<host>\S+)
# Values: TEXT
#
failregex = imapd-ssl: LOGIN FAILED.*ip=\[.*:<HOST>\]
# Option: ignoreregex
# Notes.: regex to ignore. If this regex matches, the line is ignored.
# Values: TEXT
#
ignoreregex =
Và khởi động lại fail2ban:
/etc/init.d/fail2ban restart
20. Cài đặt SquirrelMail
Để cài đặt dịch vụ webmail client SquirrelMail bạn sử dụng lệnh sau:
apt-get install squirrelmail
Sau đó cấu hình cho nó:
squirrelmail-configure
Thông báo cho SquirrelMail biết chúng ta đang sử dụng Courier-IMAP/-POP3:
D. Set pre-defined settings for specific IMAP servers
C Turn color on
S Save data
Q Quit
Command >> <– S
SquirrelMail Configuration : Read: config.php (1.4.0)
———————————————————
Main Menu —
1. Organization Preferences
2. Server Settings
3. Folder Defaults
4. General Options
5. Themes
6. Address Books
7. Message of the Day (MOTD)
8. Plugins
9. Database
10. Languages
D. Set pre-defined settings for specific IMAP servers
C Turn color on
S Save data
Q Quit
Command >> S
Data saved in config.php
Press enter to continue… <– ENTER
SquirrelMail Configuration : Read: config.php (1.4.0)
———————————————————
Main Menu —
1. Organization Preferences
2. Server Settings
3. Folder Defaults
4. General Options
5. Themes
6. Address Books
7. Message of the Day (MOTD)
8. Plugins
9. Database
10. Languages
D. Set pre-defined settings for specific IMAP servers
C Turn color on
S Save data
Q Quit
Command >> <– Q
Bây giờ chúng ta sẽ cấu hình cho SquirrelMail để có thể sử dụng nó trong các trang web được tạo từ ISPConfig bằng /squirrelmail hoặc /webmail aliases. Do đó nếu trang web của bạn là http://www.example.com, bạn sẽ truy cập SquirrelMail bằng đường dẫn http://www.example.com/squirrelmail hoặc http://www.example.com/webmail.
Apache của SquirrelMail được cấu hình trong tập tin /etc/squirrelmail/apache.conf, nhưng tập tin này không được tải bởi Apache vì nó không có trong thư mục /etc/apache2/conf.d/. Do đó chúng ta tạo ra một symlink có tên /etc/squirrelmail/apache.conf và tải lại Apache.
cd /etc/apache2/conf.d/
ln -s ../../squirrelmail/apache.conf squirrelmail.conf
/etc/init.d/apache2 reload
Mở /etc/apache2/conf.d/squirrelmail.conf:
vi /etc/apache2/conf.d/squirrelmail.conf
Và thêm vào nội dung trong phần <Directory /usr/share/squirrelmail></Directory> để đảm bảo mod_php được sử dụng cho sự truy cập vào SquirrelMail, bất kể chế độ PHP bạn chọn cho trang web của mình trong ISPConfig:
[…]
<Directory /usr/share/squirrelmail>
Options FollowSymLinks
<IfModule mod_php5.c>
AddType application/x-httpd-php .php
php_flag magic_quotes_gpc Off
php_flag track_vars On
php_admin_flag allow_url_fopen Off
php_value include_path .
php_admin_value upload_tmp_dir /var/lib/squirrelmail/tmp
php_admin_value open_basedir /usr/share/squirrelmail:/etc/squirrelmail:/var/lib/squirrelmail:/etc/hostname:/etc/mailname
php_flag register_globals off
</IfModule>
<IfModule mod_dir.c>
DirectoryIndex index.php
</IfModule>
# access to configtest is limited by default to prevent information leak
<Files configtest.php>
order deny,allow
deny from all
allow from 127.0.0.1
</Files>
</Directory>
[…]
Tạo thư mục /var/lib/squirrelmail/tmp:
mkdir /var/lib/squirrelmail/tmp
Và làm cho nó thuộc sở hữu của www-data:
chown www-data /var/lib/squirrelmail/tmp
Tải lại Apache:
/etc/init.d/apache2 reload
Như vậy /etc/apache2/conf.d/squirrelmail.conf được định nghĩa với biệt danh /squirrelmail, trong thư mục cài đặt /usr/share/squirrelmail.
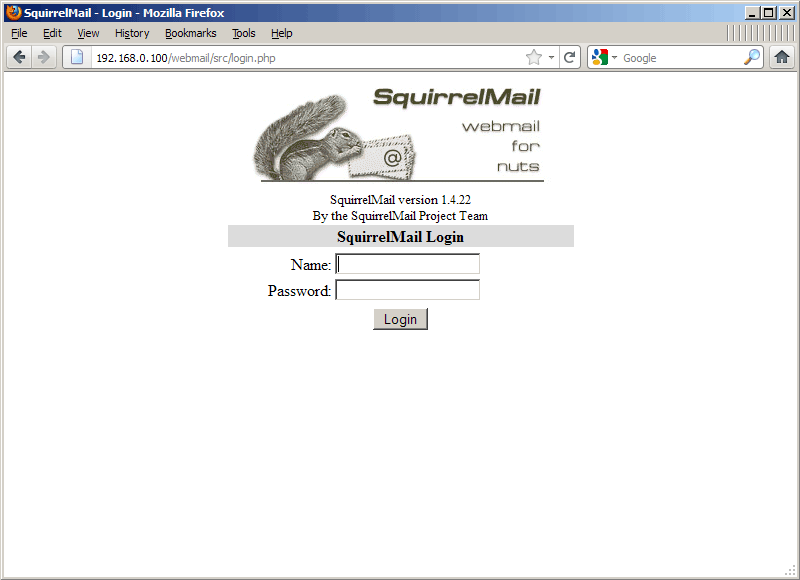
Bạn có thể truy cập SquirrelMail ngay lập tức từ website của mình:
http://192.168.0.100/squirrelmail
http://www.example.com/squirrelmail
Hoặc bạn có thể truy cập thông qua trình điều khiển của ISPConfig vhost mà không cần bất kỳ cầu hình nào (tất nhiên là sau khi đã cài đặt ISPConfig ở phần dưới đây):
http://server1.example.com:8080/squirrelmail
Nếu bạn muốn sử dụng bí danh /webmail thay cho /squirrelmail, chỉ cần mở/etc/apache2/conf.d/squirrelmail.conf:
vi /etc/apache2/conf.d/squirrelmail.conf
Và thêm vào dòng Alias /webmail /usr/share/squirrelmail:
Alias /squirrelmail /usr/share/squirrelmail
Alias /webmail /usr/share/squirrelmail
[…]
Tải lại Apache:
/etc/init.d/apache2 reload
Sau đó truy cập Squirrelmail:
http://192.168.0.100/webmail
http://www.example.com/webmail
http://server1.example.com:8080/webmail (sau khi đã cài đặt ISPConfig)

Nếu bạn muốn định nghĩa một vhost như webmail.example.com tại nơi người dùng có thể truy cập SquirrelMail, thêm dòng /etc/apache2/conf.d/squirrelmail.conf vào cấu hình của vhost:
vi /etc/apache2/conf.d/squirrelmail.conf
[…]
<VirtualHost 1.2.3.4:80>
DocumentRoot /usr/share/squirrelmail
ServerName webmail.example.com
</VirtualHost>
Thay thế 1.2.3.4 bởi địa chỉ IP chính xác của máy chủ. Đương nhiên phải có một bản ghi DNS chowebmail.example.com trỏ đến địa chỉ IP mà bạn sử dụng trong cấu hình của vhost. Ngoài ra hãy chắc chắn rằng vhost webmail.example.com không tồn tại trong ISPConfig (nếu không hai vhost sẽ gây trở ngại cho nhau).
Khởi động lại Apache:
etc/init.d/apache2 reload
Vậy là bạn đã có thể truy cập SquirrelMail theo http://webmail.example.com.
21. Cấu hình ISPConfig 3
Để cài đặt ISPConfig 3 từ bản mới nhất, sử dụng lệnh;
cd /tmp
wget http://www.ispconfig.org/downloads/ISPConfig-3-stable.tar.gz
tar xfz ISPConfig-3-stable.tar.gz
cd ispconfig3_install/install/
Tiếp theo chạy:
php -q install.php
Bộ cài đặt ISPConfig 3 sẽ cấu hình tất cả các dịch vụ như Postfix, SASL, Courie… cho bạn.
root@server1:/tmp/ispconfig3_install/install# php -q install.php
——————————————————————————–
_____ ___________ _____ __ _ ____
|_ _/ ___| ___ \ / __ \ / _(_) /__ \
| | \ `–.| |_/ / | / \/ ___ _ __ | |_ _ __ _ _/ /
| | `–. \ __/ | | / _ \| ‘_ \| _| |/ _` | |_ |
_| |_/\__/ / | | \__/\ (_) | | | | | | | (_| | ___\ \
\___/\____/\_| \____/\___/|_| |_|_| |_|\__, | \____/
__/ |
|___/
——————————————————————————–
>> Initial configuration
Operating System: Debian or compatible, unknown version.
Following will be a few questions for primary configuration so be careful.
Default values are in [brackets] and can be accepted with <ENTER>.
Tap in “quit” (without the quotes) to stop the installer.
Select language (en,de) [en]: <– ENTER
Installation mode (standard,expert) [standard]: <– ENTER
Full qualified hostname (FQDN) of the server, eg server1.domain.tld [server1.example.com]: <– ENTER
MySQL server hostname [localhost]: <– ENTER
MySQL root username [root]: <– ENTER
MySQL root password []: <– yourrootsqlpassword
MySQL database to create [dbispconfig]: <– ENTER
MySQL charset [utf8]: <– ENTER
Generating a 2048 bit RSA private key
…+++
………………………………………………………..+++
writing new private key to ‘smtpd.key’
—–
You are about to be asked to enter information that will be incorporated
into your certificate request.
What you are about to enter is what is called a Distinguished Name or a DN.
There are quite a few fields but you can leave some blank
For some fields there will be a default value,
If you enter ‘.’, the field will be left blank.
—–
Country Name (2 letter code) [AU]: <– ENTER
State or Province Name (full name) [Some-State]: <– ENTER
Locality Name (eg, city) []: <– ENTER
Organization Name (eg, company) [Internet Widgits Pty Ltd]: <– ENTER
Organizational Unit Name (eg, section) []: <– ENTER
Common Name (eg, YOUR name) []: <– ENTER
Email Address []: <– ENTER
Configuring Jailkit
Configuring SASL
Configuring PAM
Configuring Courier
Configuring Spamassassin
Configuring Amavisd
Configuring Getmail
Configuring Pureftpd
Configuring BIND
Configuring Apache
Configuring Vlogger
Configuring Apps vhost
Configuring Firewall
Installing ISPConfig
ISPConfig Port [8080]: <– ENTER
Configuring DBServer
Installing ISPConfig crontab
no crontab for root
no crontab for getmail
Restarting services …
Rather than invoking init scripts through /etc/init.d, use the service(8)
utility, e.g. service mysql restart
Since the script you are attempting to invoke has been converted to an
Upstart job, you may also use the stop(8) and then start(8) utilities,
e.g. stop mysql ; start mysql. The restart(8) utility is also available.
mysql stop/waiting
mysql start/running, process 2302
* Stopping Postfix Mail Transport Agent postfix
…done.
* Starting Postfix Mail Transport Agent postfix
…done.
* Stopping SASL Authentication Daemon saslauthd
…done.
* Starting SASL Authentication Daemon saslauthd
…done.
Stopping amavisd: amavisd-new.
Starting amavisd: amavisd-new.
* Stopping ClamAV daemon clamd
…done.
* Starting ClamAV daemon clamd
Bytecode: Security mode set to “TrustSigned”.
…done.
* Stopping Courier authentication services authdaemond
…done.
* Starting Courier authentication services authdaemond
…done.
* Stopping Courier IMAP server imapd
…done.
* Starting Courier IMAP server imapd
…done.
* Stopping Courier IMAP-SSL server imapd-ssl
…done.
* Starting Courier IMAP-SSL server imapd-ssl
…done.
* Stopping Courier POP3 server…
…done.
* Starting Courier POP3 server…
…done.
* Stopping Courier POP3-SSL server…
…done.
* Starting Courier POP3-SSL server…
…done.
* Restarting web server apache2
… waiting …. …done.
Restarting ftp server: Running: /usr/sbin/pure-ftpd-mysql-virtualchroot -l mysql:/etc/pure-ftpd/db/mysql.conf -l pam -8 UTF-8 -O clf:/var/log/pure-ftpd/transfer.log -D -H -b -A -E -u 1000 -Y 1 -B
Installation completed.
root@server1:/tmp/ispconfig3_install/install#
Các dịch vụ được cấu hình tự động nên bạn không cần thiết lập thủ công.
Sau đó bạn có thể truy cập ISPConfig 3 theo http://server1.example.com:8080/ hoặchttp://192.168.0.100:8080/. Đăng nhập vào với tên tài khoản và mật khẩu đều là admin (bạn nên thay đổi mật khẩu mặc định này sau lần đăng nhập đầu tiên).


Hệ thống của bạn đã sẵn sàng để sử dụng.
22. Các link tham khảo
Ubuntu: http://www.ubuntu.com/
ISPConfig: http://www.ispconfig.org/
Nguồn: Đ.Hải – Quantrimang